What is it, which strategy is right for you, and how does this test benefit your building?
ASTM E 1186 is a testing standard for air leakage as applies to building envelopes & air barrier systems. Air leakage is the cause for many concerns related to occupant comfort and indoor air quality. It also affects the energy used when heating, cooling, or dehumidifying a building. This testing standard offers several options for performing the testing. Which method is best for your project? Let’s dig in!
As a Commissioning Authority, we are often relied upon to evaluate a system or product and help determine what may be best for a particular application. This testing standard is often specified with the best intent, but the specifier is not always aware of the many options within the standard. Specifying a testing standard without a defined path makes it difficult for the bidding contractor to properly budget for this testing, and for the Construction Manager to coordinate the required support.
Projects typically enter the envelope testing phase with unanswered questions about a specified test. Some common questions include “how much pressure is being applied?”, “what constitutes Pass/Fail?”, “to which location should we be applying this test?”, “how often?”, “how many?”, etc. When a testing standard does not define 100% of the testing parameters, there is a chance it will be applied incorrectly, or even worse, when the testing is complete it may be unclear whether the specimen has passed or failed. What makes ASTM E 1186 different from other testing standards is the number of available options or paths that the testing agency is offered. Some of these options may be unrealistic or inappropriate for your specific application, or on the other hand, there may be more than one method of testing that is applicable to your application.
Let’s look at the differences between the ASTM E 1186 testing methods and break down some of the pros and cons of each, to help clarify where it would be most appropriate to apply each method.
There are 7 types of tests outlined in this standard. These tests are broken out into 3 different testing methods:
Test Method 1:
Description:
Pressurize or depressurize the building using the building HVAC system or using blower door assemblies. The tests outlined for this method of testing suggest using a smoke tracer, gas tracer, air measurements, or thermal imaging at potential leakage areas to help determine if a leak is present.
Pros:
- If using a thermal imaging camera, the testing agency can observe a greater area and find potential leakage points on a large area of the building in less time.
- Some of these methods may be the best applications for existing buildings where air leakage around old windows or curtain wall seals are being targeted.
Cons:
- Maintaining consistent building pressures may be difficult if the building is occupied. Open windows and doors will prevent constant pressures.
- Attempting to pressurize a large building with multiple blower door assemblies may prove difficult.
- One of the testing options requires a delta-T (indoor/outdoor) of 5 deg C (41 deg F). Scheduling at a time when the temperature differences are applicable may prove difficult.
- Attempting to pressurize or depressurize a building with the HVAC system may introduce stress to older equipment or duct systems.
- A new construction project will likely not have the HVAC systems operational at the time of testing. The reason for specifying this type of test on a new construction project would be to find potential issues early (prior to exterior or interior finishes) so the issues can be corrected while they are accessible.
- Several of these tests requires the use of expensive equipment.
- For the tests using smoke or gas, very still ambient wind conditions are required.
Test method 2:
Description:
In lieu of using pressure to drive air leakage, this method suggests using sound differences to locate potential air leakage sites. The intent of this method is to have a sound generating machine on either the interior or exterior of the building assembly and having a sound detection device on the opposite side.Air leakage can be determined where an increase in sound is observed.
Pros:
- This test does not need the building to be fully pressurized.
- Sound generation and detection devices are easy to find and purchase.
Cons/Limitations:
- The surrounding location would ideally be silent so the sound detection device is only reading the sound from the sound generating machine. Finding a silent interior or exterior of any building (old or new) would prove difficult.
- If applied to new construction, where there is a transition in materials (going from a curtain wall to an air barrier, where an air leakage site would likely be), there would normally be a change in sound. It would be very difficult to pinpoint the location of an air leak in these potential leakage areas.
- A small penetration in an air barrier assembly may not be detectable with this type of testing.
- Leakage may not be properly identified if applied to an older building, roof, or wall system.
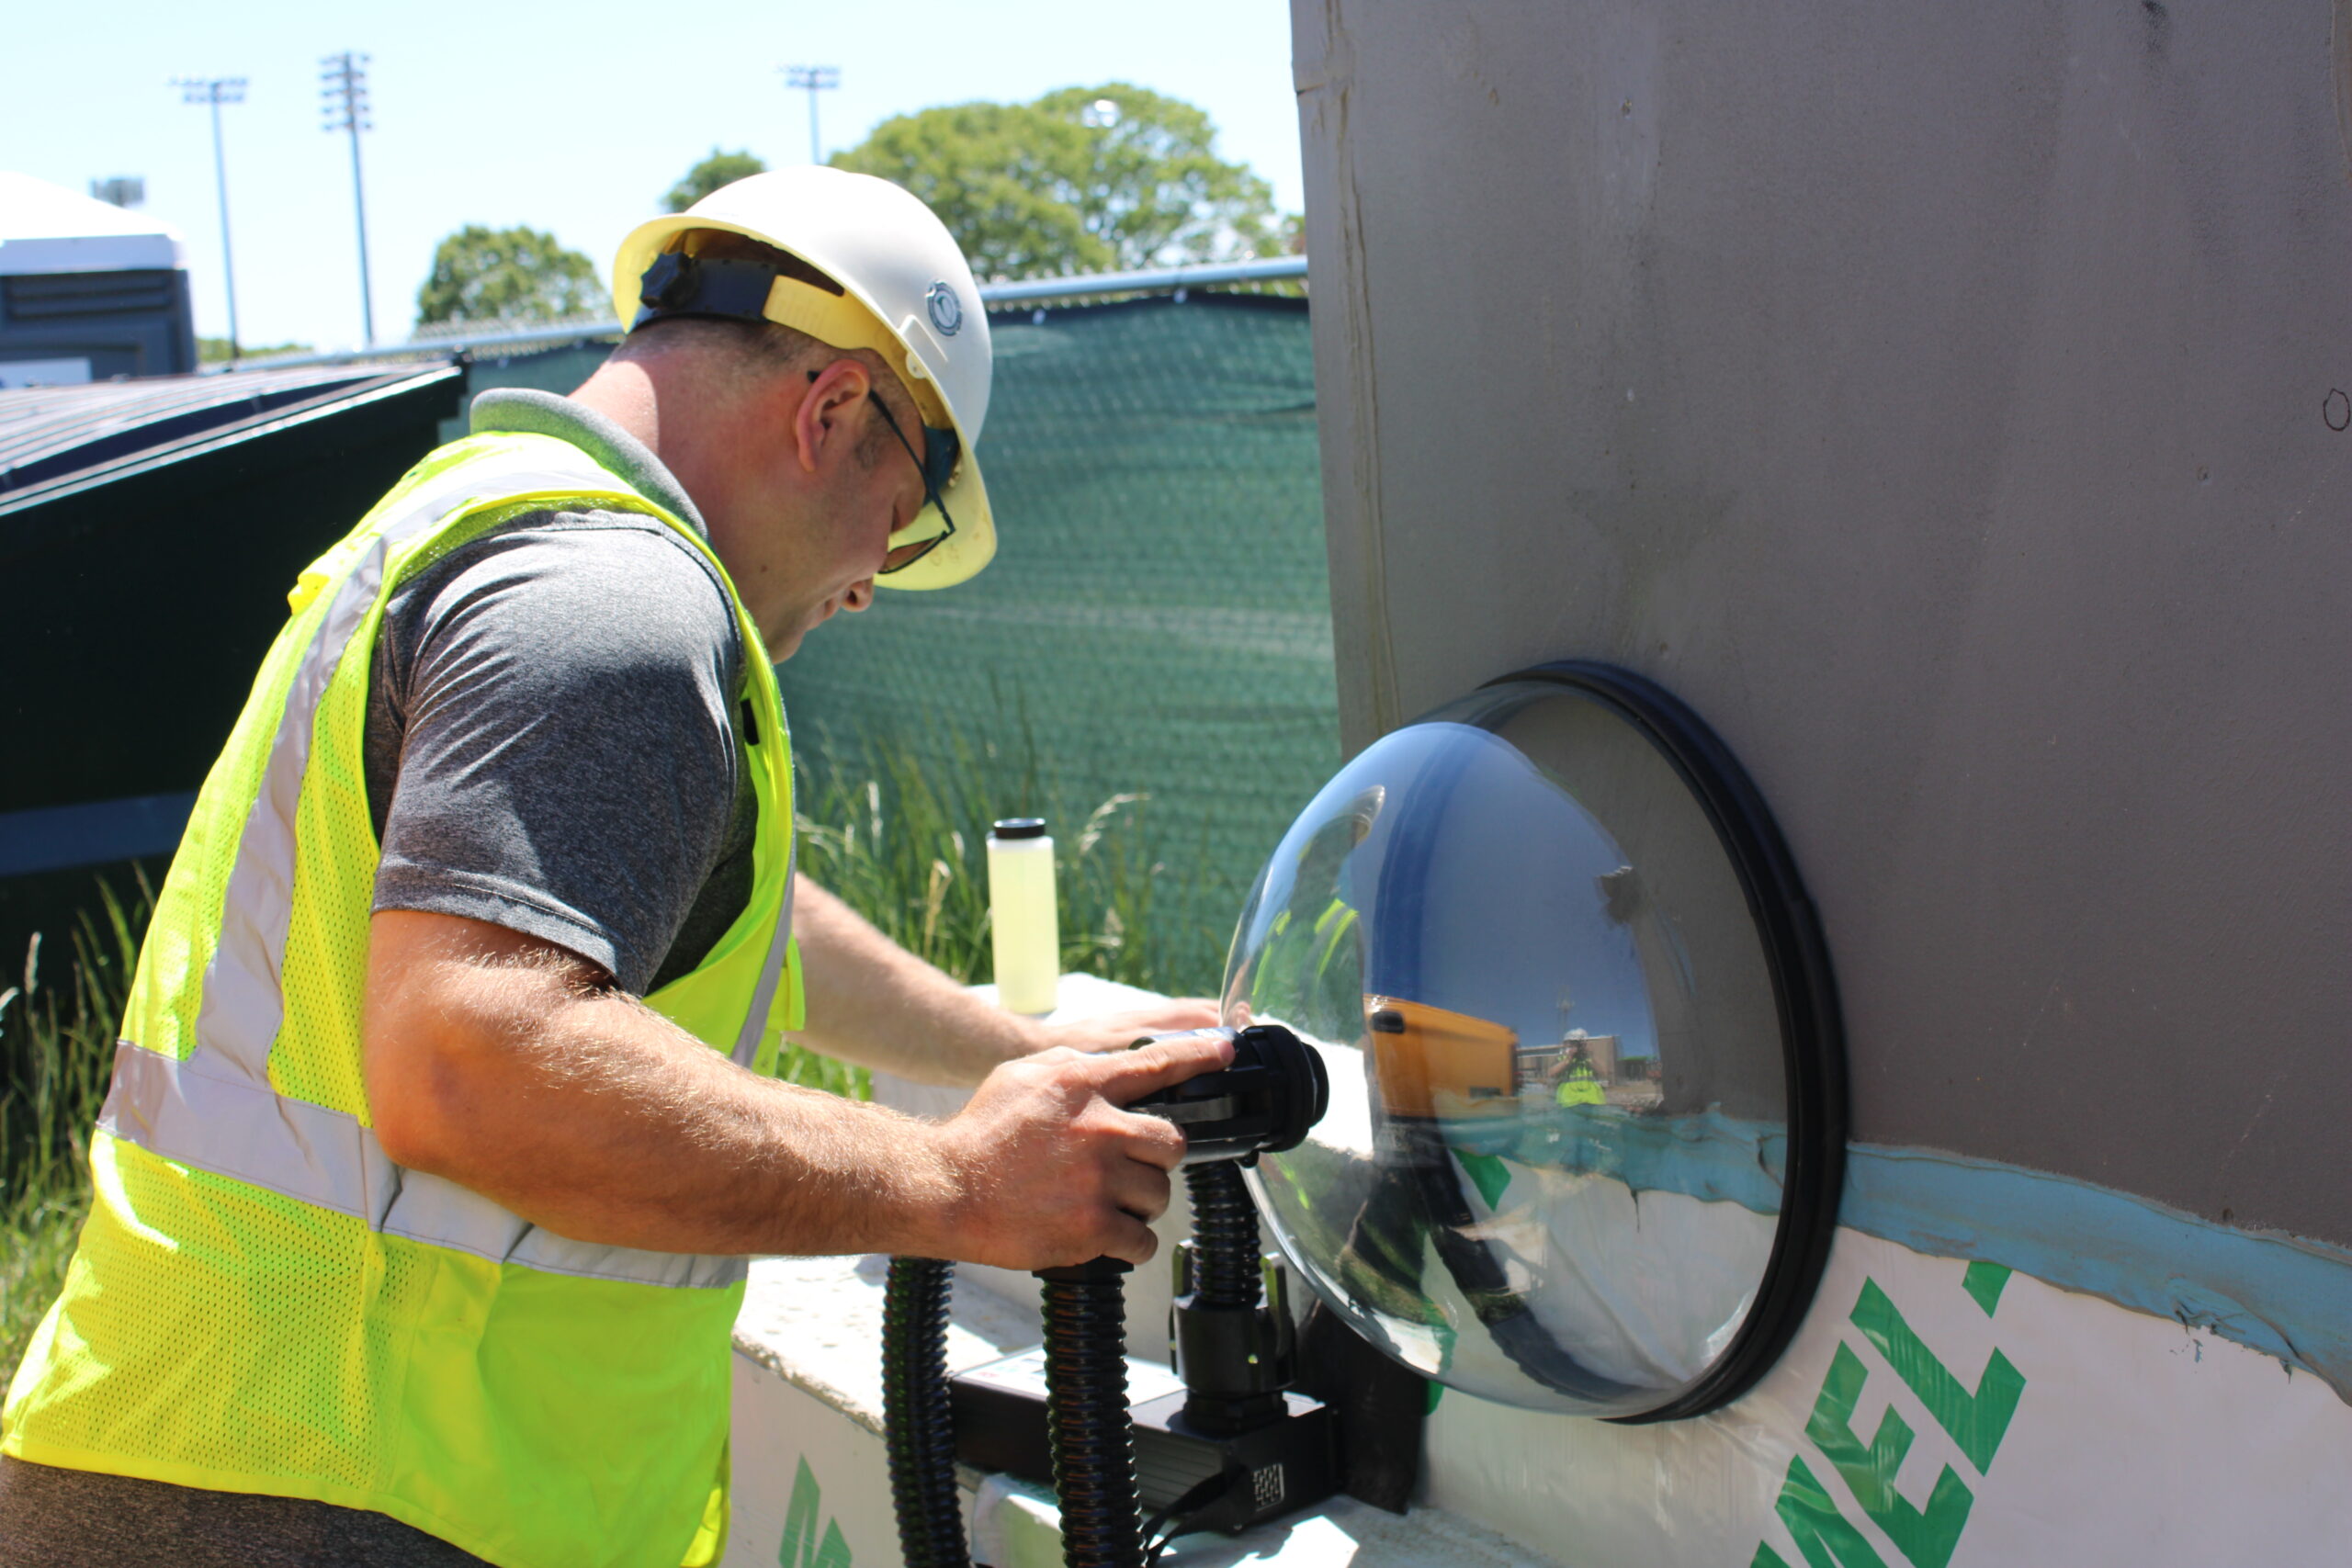
Test Method 3:

Description:
The third method of testing targets areas of the envelope by using a chamber (bubble tester) to create an area of depressurization to pull air through a potential leakage site.The testing standard offers two suggested paths for this. One is to use a liquid solution that is applied directly to the testing area. If there is a leak, air is pulled through and creates a bubble, indicating a leak. The other is to use tracer smoke or theatrical fog on one side of the system that would be pulled through the leakage point.
Pros:
- The testing agency can review the application and select a location of potential concern. The test can be focused on that specific location.
- Surrounding noise, activity, temperatures, or other ambient conditions would not prevent the test from being performed or skew test results.
- This is the only test method that can be applied to a mock-up on a new construction site.
- This type of test can also be applied to a single ply roofing system to check roof seams, test a suspect puncture, or test a newly repaired section of roof.
- This method of testing can detect very small leaks such as holes from screw heads, nail holes, roof seams, etc.
Cons/Limitations:
- This test is focused on a smaller area (limited to the size of the test chamber) but can be used at many test locations on a building.
- This method cannot be used at window/curtain walls.
- For existing buildings, this would only be applicable to a single ply roof system.
There are many things to be considered when selecting and specifying the ASTM E 1186 testing standard for your project. In an existing building scenario where an evaluation is needed to determine if the windows leak and should be replaced, a pressurized building with tracer gas may be applicable. However, in a new construction scenario, the pressurized chamber (bubble tester) approach is likely the best application for your project. With this method, the testing agency can review an applied system or material, and target areas of potential failure (transitions in materials, joints, or screw heads through the air vapor barrier (AVB) system, or suspect roof seams). If leaks are detected, not only can the leak be repaired before it is enclosed, but the installing contractor can review their work and help ensure that the failed specimen is not an ongoing problem in the wall or roof system.
This chamber type of testing, along with a properly applied Building Envelope Commissioning Process (BECx) can help drastically reduce areas of air leakage within a building, improving energy efficiency and overall health and quality of the indoor building environment.
Contact us or click here to learn more about our envelope testing services.